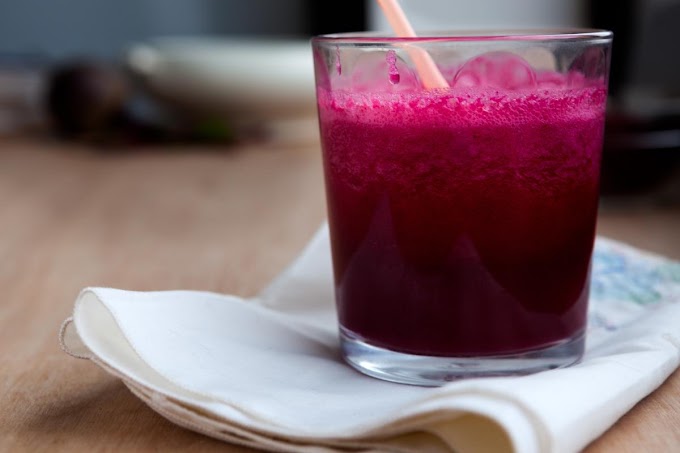
Ribena is a beloved blackcurrant drink that has been a favorite in households for generations. Known for its rich, tangy flavor and deep purple hue, this drink is not only refreshing but also packed with vitamin C, making it a nutritious choice as well. While the store-bought version is convenient, making your own Ribena at home can be a rewarding experience. It allows you to control the ingredients, ensuring a healthier and more natural version without preservatives or artificial additives. In this blog, we will explore the steps to make your homemade Ribena, along with some tips and variations to suit your taste.
Ingredients You’ll Need
Before diving into the recipe, it’s essential to gather all the necessary ingredients. The core ingredient, of course, is blackcurrants, but a few other items will help you achieve the perfect homemade Ribena.
Blackcurrants: 1 kg (fresh or frozen)
Granulated Sugar: 500 g (adjust to taste)
Water: 500 ml
Lemon Juice: 1-2 tablespoons (optional, for added tanginess)
Citric Acid: 1 teaspoon (optional, acts as a preservative and enhances the tanginess)
Step 1: Preparing the Blackcurrants
The first step in making homemade Ribena is preparing the blackcurrants. If you're using fresh blackcurrants, start by washing them thoroughly to remove any dirt or debris. Place the blackcurrants in a colander and rinse them under cold running water. For frozen blackcurrants, allow them to thaw before proceeding with the recipe.
Once cleaned, you’ll need to remove the stems from the blackcurrants. This can be a bit tedious, but it’s worth it for the smooth texture of the final product. Use a small knife or simply pinch off the stems with your fingers.
Step 2: Cooking the Blackcurrants
After the blackcurrants are prepped, it’s time to cook them. In a large pot, combine the blackcurrants with 500 ml of water. Bring the mixture to a boil over medium heat. Once it reaches a boil, reduce the heat to low and let it simmer for about 20 minutes. During this time, the blackcurrants will soften, and their juices will be released into the water.
While simmering, occasionally stir the mixture and gently press the blackcurrants with the back of a spoon to help release more juice. This step is crucial for extracting the maximum flavor and color from the fruit.
Step 3: Straining the Juice
Once the blackcurrants have cooked down and released their juices, it’s time to strain the mixture to separate the juice from the pulp and seeds. To do this, place a fine-mesh sieve or cheesecloth over a large bowl or jug. Carefully pour the cooked blackcurrants into the sieve, allowing the juice to flow through.
Use the back of a spoon to press down on the pulp in the sieve, extracting as much juice as possible. If you want a clearer juice with no pulp, you can strain it again using a cheesecloth. This will ensure a smooth and refined Ribena concentrate.
Step 4: Adding Sugar
Now that you have the blackcurrant juice, it’s time to sweeten it. Transfer the juice back into the pot and add the sugar. The amount of sugar you use can be adjusted according to your taste. For a less sweet version, you can reduce the sugar to 300-400 g, or for a sweeter Ribena, increase it slightly.
Heat the mixture over low heat, stirring constantly until the sugar is fully dissolved. Be careful not to let the mixture boil at this stage, as high heat can alter the flavor and texture of the Ribena.
Step 5: Optional Additions
For a bit of extra zing, you can add a tablespoon or two of lemon juice to the mixture. This will give your Ribena a slightly tangy edge, which complements the sweetness of the blackcurrants beautifully.
If you plan to store your homemade Ribena for an extended period, consider adding a teaspoon of citric acid. This natural preservative will help extend the shelf life of your Ribena, keeping it fresh for longer.
Step 6: Bottling the Ribena
Once the sugar has completely dissolved, and any optional ingredients have been added, it’s time to bottle your homemade Ribena. Sterilize your bottles or jars by washing them in hot soapy water, rinsing thoroughly, and then placing them in an oven at 140°C (284°F) for about 10 minutes.
Carefully pour the Ribena concentrate into the sterilized bottles, leaving a small gap at the top. Seal the bottles tightly with lids. Allow the Ribena to cool to room temperature before storing it in the fridge. Your homemade Ribena should keep for up to 2-3 months in the refrigerator.
How to Serve Homemade Ribena
Homemade Ribena is a concentrated syrup, so it needs to be diluted before serving. To enjoy a glass of Ribena, mix one part concentrate with four parts cold water. You can adjust the dilution ratio according to your taste. Ribena is traditionally served chilled, but it can also be enjoyed warm as a soothing winter drink.
For a refreshing twist, try mixing Ribena with sparkling water instead of still water. This will give your drink a fizzy lift, making it perfect for hot summer days. You can also use Ribena as a base for cocktails or mocktails, adding a splash of soda water, lemon, or mint for extra flavor.
Variations and Tips
Berry Mix: While blackcurrants are the star of the show, you can experiment with adding other berries to your Ribena. Raspberries, blueberries, or strawberries can be combined with blackcurrants for a mixed berry Ribena.
Herbal Infusions: Add a sprig of fresh mint or a few basil leaves during the simmering process for a subtle herbal note in your Ribena.
Sugar Alternatives: If you’re looking to reduce the sugar content, you can try sweetening your Ribena with honey, agave syrup, or stevia. Be sure to adjust the quantities to taste, as these sweeteners have different levels of sweetness compared to sugar.
The Nutritional Benefits of Homemade Ribena
One of the most significant advantages of making your own Ribena is that you can enjoy the nutritional benefits of blackcurrants without any unwanted additives. Blackcurrants are a rich source of vitamin C, even more so than oranges, which is excellent for boosting your immune system. They also contain antioxidants, which help protect your body from free radicals and reduce inflammation.
By controlling the amount of sugar in your homemade Ribena, you can make it a healthier alternative to store-bought versions, which often contain high levels of refined sugar and artificial sweeteners.
Conclusion
Making homemade Ribena is not only a fun and rewarding kitchen project but also a way to enjoy a healthier, more natural version of this classic drink. With just a few simple ingredients and steps, you can create a delicious, vitamin-rich beverage that’s perfect for any time of the year. Whether you enjoy it cold on a hot day or warm during the winter, homemade Ribena is a versatile drink that the whole family can appreciate.
So, the next time you find yourself craving that nostalgic taste of Ribena, why not try making it at home? With this recipe, you’ll have a bottle of your very own homemade Ribena ready to enjoy and share with loved ones.


Social Plugin